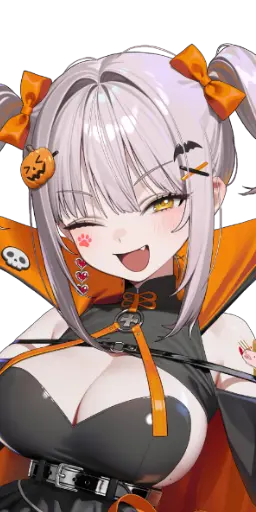
 SSR
 Tetra
 Supporter
 Rocket Launcher
 Water
 Type 2
Released 10/8/2026
This guide was translated into English by AI from the Korean version. View original (Korean)
A Burst 2 Supporter focused on one damage-over-time DPS; unless your account runs Mihara: Bonding Chain or Bready as a main, there is little reason to use her.
Most of her buffs apply only to the ally directly to her right, and with a 40-second Burst cooldown you need another Burst 2, so she has low versatility.
In return, she greatly boosts the damage of a damage-over-time DPS on her right.
When Full Burst starts, she grants the ally to her right Increased ATK based on caster's ATK for 10 seconds, and gains Ghost Costume and Max HP increase herself. Each Full Charge shot raises her right ally's damage over time for 5 seconds, and if a Full Charge hits while in Ghost Costume, it applies Damage Taken increase to the enemy. Her Burst Skill also grants the ally to her right Increased ATK based on caster's ATK and damage-over-time increase for 10 seconds.
Most buffs apply from Full Burst start and Full Charge alone, so she can be used as a totem who never Bursts. Ghost Costume is removed when she takes a direct hit, after which the Damage Taken increase debuff no longer applies.
Auto is enough.
Her Full Charge interval is shorter than the duration of S2's damage-over-time increase, so even on auto the buff on her right ally never drops.
Belorta's Burst cooldown is 40 seconds, so add another Burst 2 Nikke and a Burst cooldown reduction Nikke.
Placed to Belorta's right, she receives both Increased ATK and damage-over-time increase for a big damage jump.
As a DPS with no self Increased ATK, she benefits greatly from the ATK boost she gets on Belorta's right.
In Mihara squads, Flora with her Favorite Item takes the other Burst 2 slot.
 Resilience Cube2
 Bastion Cube
Use Resilience Cube by default, and Bastion Cube if your Overload has high Max Ammo. If Harmony Cube levels differ greatly, use the higher-level cube over the ranking.
Overload option values do not affect Increased ATK based on caster's ATK, so do not spend resources rerolling options. Base ATK from swapping and enhancing Overload gear does count, so do enhance your gear; for options, 1 or 2 lines of Max Ammo for Burst Gauge generation is enough.
The Damage Taken increase on enemies and the damage-over-time increase for her right ally are on S2, so raise it first. The Increased ATK on S1 and Burst is based on caster's ATK, so it scales off the Supporter's ATK and gains little per level.
Used in Solo Raid boss fights with damage-over-time DPS squads like Mihara: Bonding Chain and Bready. Not used in Story or the Arena.
She funnels large Increased ATK and damage-over-time boosts into the one ally on her right.
Even without using her Burst, Full Burst start and Full Charge apply her buffs, so she can be used as a totem.
In Ghost Costume, she applies Damage Taken increase to enemies.
Her buff target is the single ally directly to her right, so placing her in position 5 means no buff applies.
Without a damage-over-time DPS, her buff value drops sharply.
Her Burst cooldown is 40 seconds, so you need another Burst 2.
 NikkeHub


